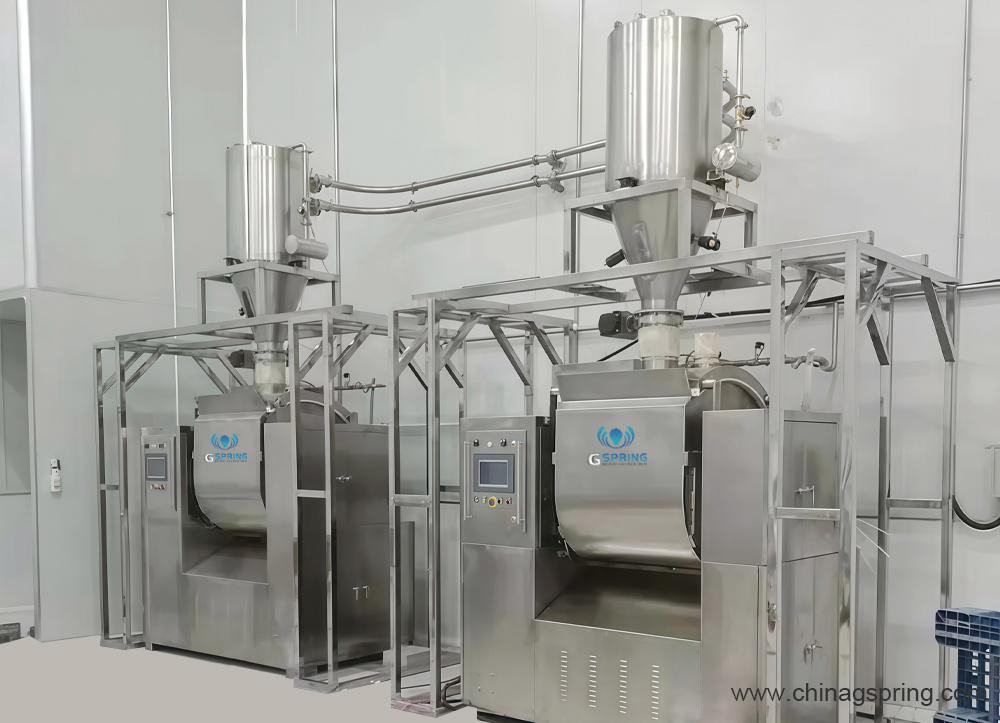
1. Horizontal dough mixer
2. Equip with dough tank lifter & flour vaccum conveyor for automatic dough process system
Basic Introduction and Advantages
1.Produce high-quality dough:
1)The mixer has water cooling system and equipped Y-shape mixing device. When mixing dough, there is many different processing mode, such as lifting, beating,
folding, kneading , pressing, pulling, etc. This design would reduce the damage to the gluten and help the dough to get even network;
2)Water cooling system would ensure that the mixer’s temperature is suitable during operation.
2.The mixing efficiency is quite high and it needs only 5~8 minutes to finish one batch of dough mixing.
3.Operation is very simple: controller is by Man-Machine Interface Touchscreen and PLC system.
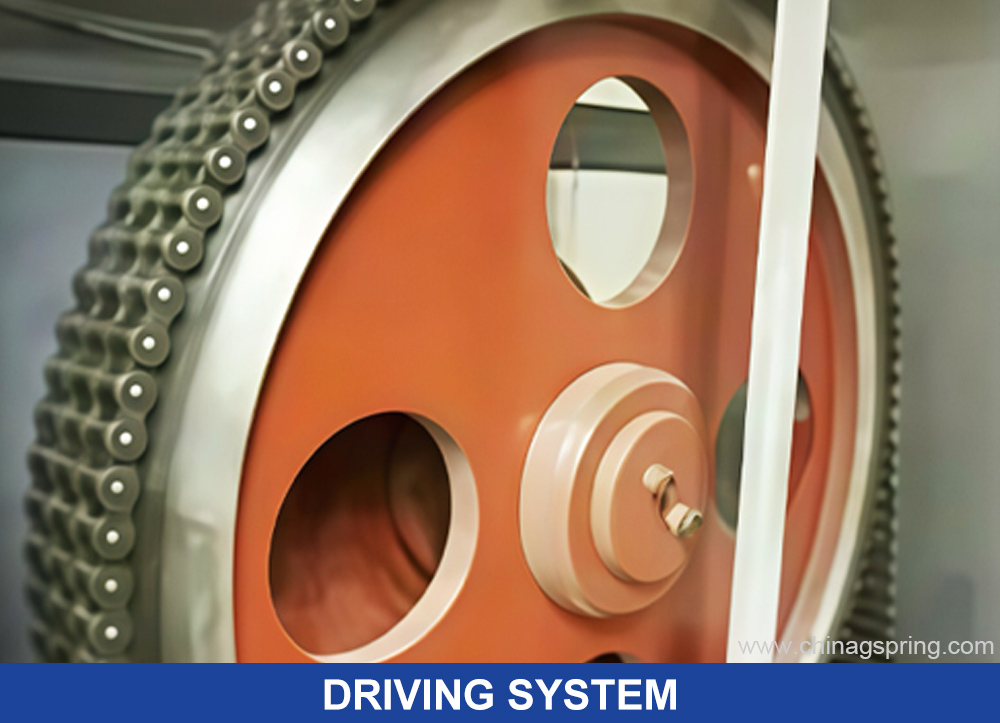
4.Driving system is by multiplex chains and automatic lubricant device is equipped, which ensures easy maintenance, stable performance and long lifespan.
5.Two sets of lubricant oil pumps are equipped to add lubricant oil automatically.
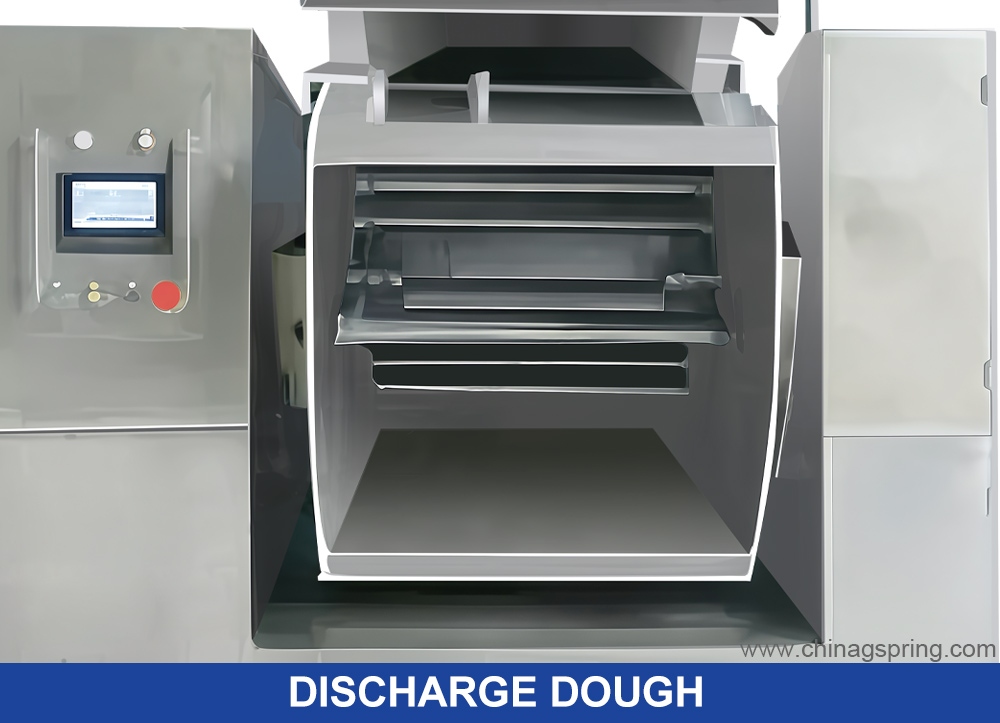
6.Labor intensity is highly reduced: there is matched automatic water feeding and flour feeding system for this mixer. And when dough is well mixed, the dough cylinder
would turn over and discharge out the dough automatically.
7.The mixer is high quality food grade: all contact parts are made from stainless steel 304. The edges and corners are also easy to clean.
VD-1-HMJ model dough mixer technical parameters
Dough weight | Dry flour 100KG/ or dough 155kg mixing timer: around 6min |
Dough density | Strong/soft two kinds |
Shaft speed | (low speed)39r/min; (high speed)78r/min Double speed motor |
Mixing motor power | 17/26KW |
Motor for turn over tank | 0.55KW |
Electricity | AC380V 50HZ |
Air compressor | 0.4---0.6MPa |
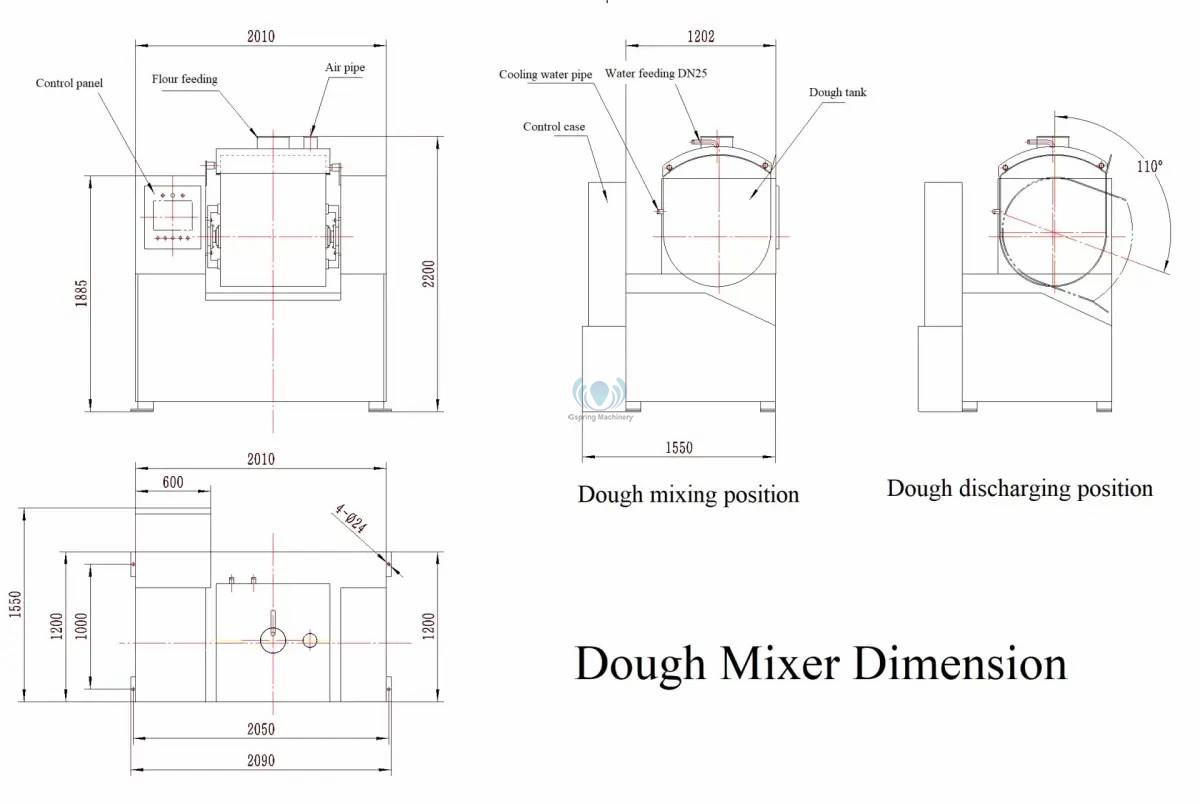
Dimension | (L)2020x(w)1550x(H)2200mm |
Weight | 2700KG |
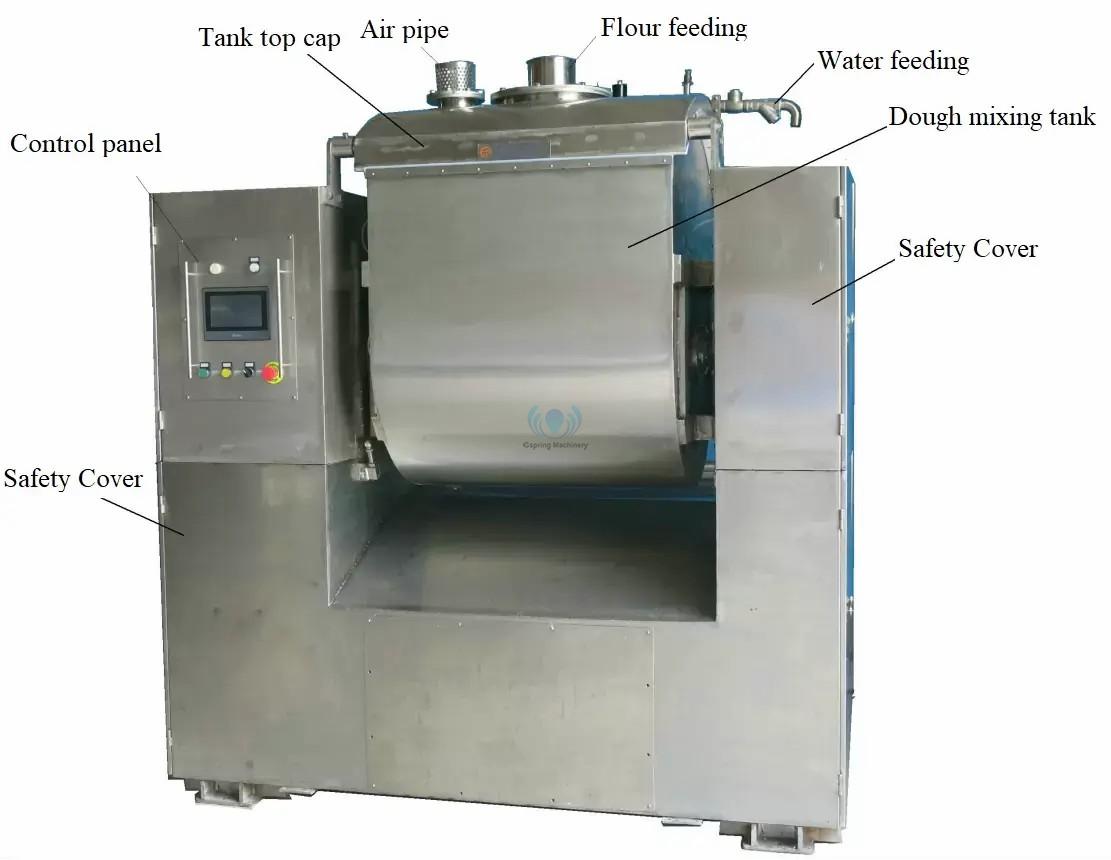
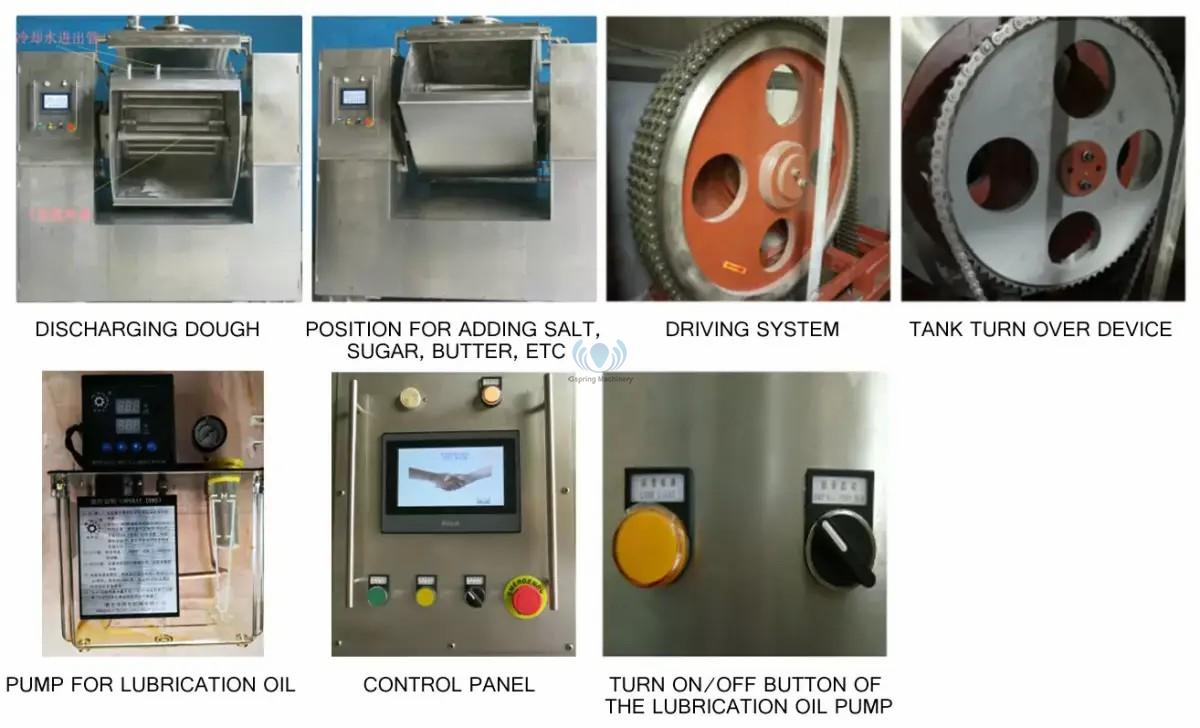
Main structure
Machine installation
1. Installation the mixing machine main body
1.1 Put the mixer on a flat and strong floor. If necessary, better arrange ground bolt in advance.
1.2 After fix the machine, separate the control case above 5cm distance from the mixer, so that the vibration of mixer would not influence the electrical elements during operation
1.3 Check carefully and make sure that all the connection is well and fastened tightly, and the buttons and electrical lines no have broken.Find professional electricians and make the electricity connections
1.4 Make sure that the electricity resource is matched with machine requirements.
1.5 Install the earth line well
1.6 Use 16mm2 copper cable with 4 lines (3+1) or 3 cores 16mm2 line and 1 separate 2mm2 line;
1.7 A separate 100A circuit breaker is recommended to install for this dough mixer. The main cable resource for connecting this mixing machine or the circuit breaker need use copper nose fasten tightly and fill in tin to solid it.
1.8 Check and make sure that the electricity connection (ABC) &(N)is well matched as machine marked, and then can turn on the electricity for trial run.
Do make sure the well connection of the ground line.
2.Install the flour feeding system (see to the separate manual for flour feeding system)
2.1 Fix the flour feeding system on top of the mixing tank
2.1 Connect the flour feeding to the flour feeding pipe of the tank, use soft connection.
3.Install the air pipe
3.1 Install the air pipe onto the top of mixing tank
3.2 Use filter cloth to cover the air pipe tightly
4.Install the automatic water feeding system (see to the separate manual for water feeding system)
4.1Connect the water feeding system to the feeding pipe of the mixing tank
4.2Check whether the connection are all well sealed
5.Check the lubrication oil pump
5.1Make sure the engine oil of the pump is enough
5.2Make sure the oil pipe connection are fastened well
6.Check the drive system
6.1Whether the V shape belt is fastened well with suitable tightness
6.2Whether the three drive chains are fastened well with suitable tightness
6.3Add No.20 lubrication oil to the oil tank under the drive chain and make sure that at least 3 gears of the chain is submerged under the oil level.
7.Check the tank over-turning device
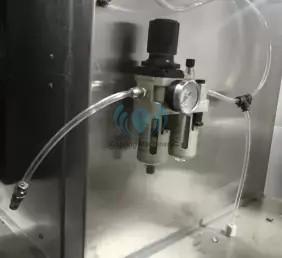
7.1Connect the air resource to the air pipe of mixing tank (this air device is at the backside of the machine)
Adjust the pressure regulating valve meter and set the air pressure around 0.5-0.7MPa
Machine trial running
1.Clean all the items
2.Turn on the electricity
2.1Turn all the circuit breaker to “ON” situation
2.2Turn on the control case fan for discharge heat
3.Lubrication oil pump working
3.1Turn on the pump, check all the oil pipes to see whether have oil flowing
3.2Based on the flowing rate, adjust the pump
4.Control panel instruction
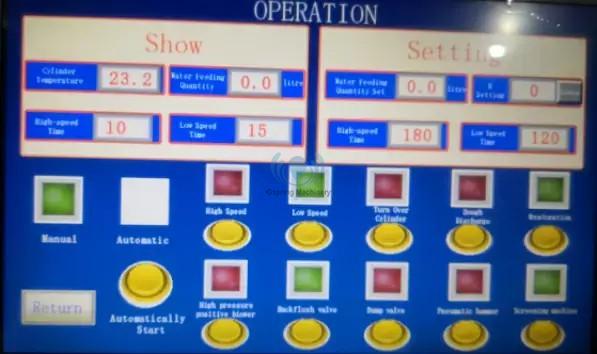
After 10s turn on the electricity, the control panel would show this screen and choose the English language to enter the operation system

4.1Figure setting introduction
Take an example of setting low speed mixing time:
The unit for high speed and low speed mixing is by seconds,
Normally for 100kg of lour, need add 55kg water, and set the low speed mixing for 120S and high speed mixing for 180S.
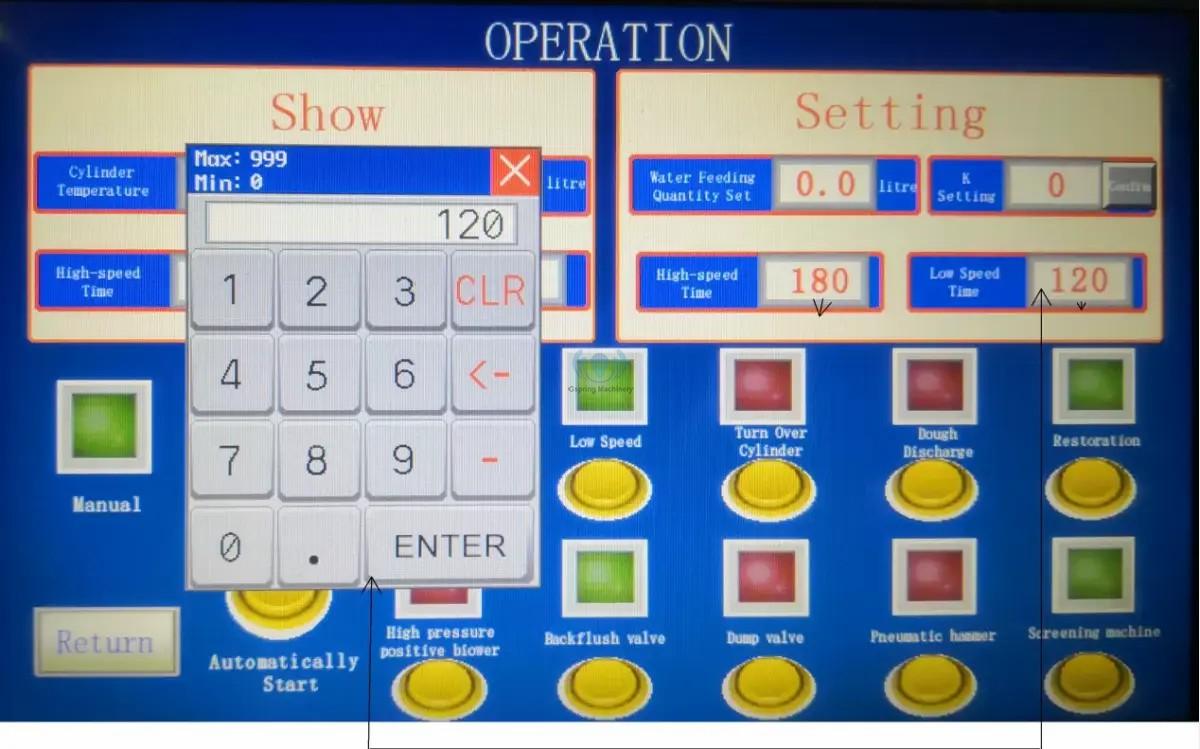
Press the frame, and comes out the table for inset, press the figure and press ENTER for confirm.
4.2Turning over direction
Turn the manual/automatic valve to manual mode, and the manual operation button on the screen would turn on;
Press the turn over cylinder button gently, if the dough tank turn down, means electrical connection are right; if the tank doesn’t move or have fault, means electrical connection is no right, please replace the connection of either two cables.
After the tank turn, press the Dough discharge button gently and check whether the mixing shaft moving to the marked direction;
Press the restoration button and check whether the tank can back to the suitable position.
Remark: the directions of tank turning over, restore back and mixing shaft moving direction are all well set. If any thing wrong, just replace the connection of either two cables.
4.3Check the mixing tank location (very important, otherwise might destroy the turning over device)
Turn the manual/automatic valve to manual mode, and the manual operation button on the screen would turn on;
4.3.1 Dough discharge position
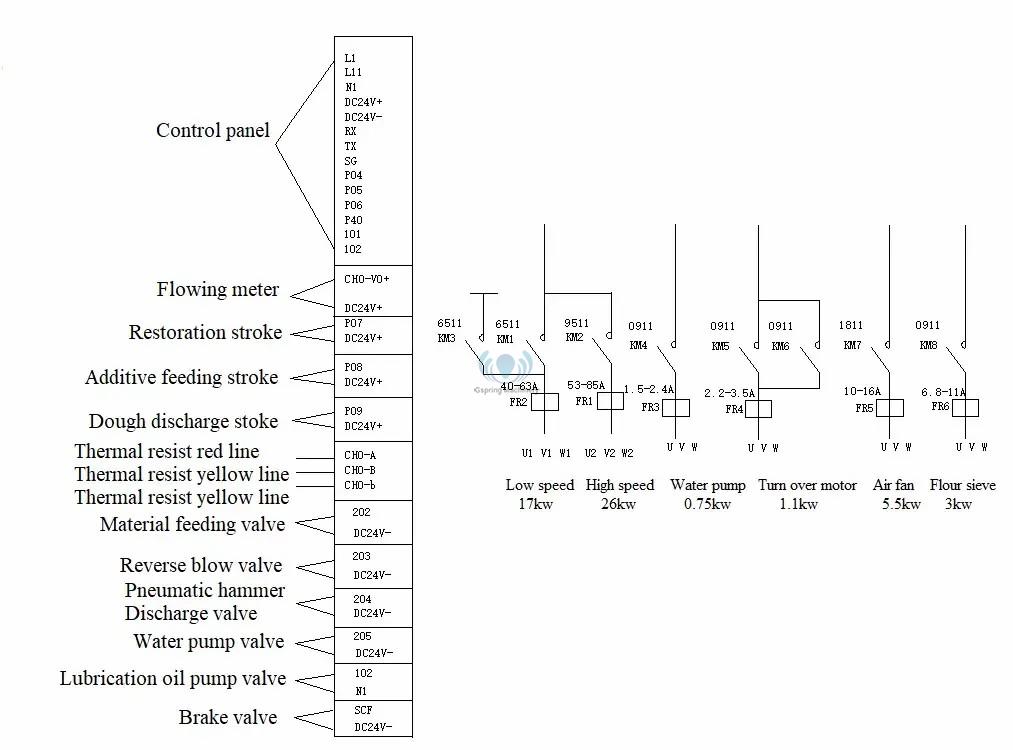
Keep pressing the cylinder turn over button and the tank would arrive at the position of dough discharge (the dough discharge stroke would sensor it ), then the turn over motor would stop automatically and the pneumatic brake start function.
4.3.2 Position for adding additives
Keep press restoration button, the tank would turn back, when it arrives the position for adding additives, the tank would stop automatically, and then add the yeast, salt, sugar, improver, fat, etc and then press the restoration button again, the tank would totally turn back.
If necessary, you can adjust this additive feeding stoke to get the suitable position for your staff.
Remark: the second time to press the restoration button should wait for above 6 seconds.
4.3.3 Position for restoration
After feeding the additives, press the restoration button and the tank would totally turn back. (The restoration stroke would sensor it), then the turn over motor would stop automatically and the pneumatic brake start function.
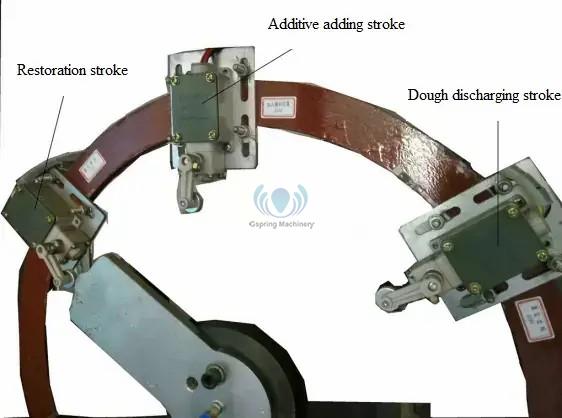
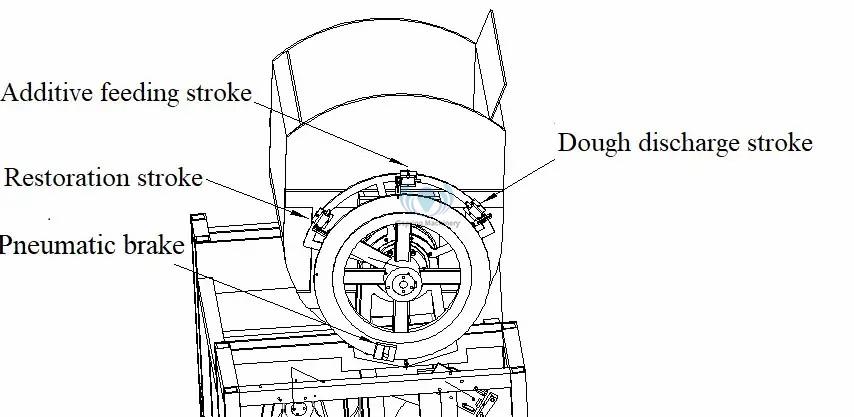
4.4 Lubrication
4.4.1 After turn on the electricity of the mixing machine, start the lubrication oil pump and check whether the lubrication oil is flowing evenly. You can adjust the quantity and flowing rate based on actual requirements.
4.4.2 Please make the lubrication every time when you start the mixing machine. And check the lubrication situation of driving device. If the temperature increase faster during operation, please add the lubrication frequency.
Operation flowing process
After finish the trial running without flour and make sure everything is fine, can start feeding machine and make the running.
During this whole process, the staff should pay special attention and any abnormal situation occur, just press the emergency button immediately.
1.Turn the tank to additive feeding position and add the additives;
2.Press the restoration button, and turn the tank back;
3.Start the flour feeding system, feed in the flour;
4.Meanwhile, start the water feeding system and feed in the water;
5.Press the automatic button to start mixing;( the machine would start in low speed say 120S and change to high speed automatically say 180S. Finish the rated mixing time, the machine would stop automatically and give an alarm to remind operator);
6.Press the cylinder turn over button and the tank would turn to dough discharge position;
7.Press dough discharge button, shaft would move and discharge out the dough;
8.Press the restoration button, tank would start turn back and then stop at the additive feeding position;
9.Adding additives and wait for 6 seconds to press the restoration button again, the tank would fully turn back;
10.Start adding the flour and water, then repeat the next batch of mixing process
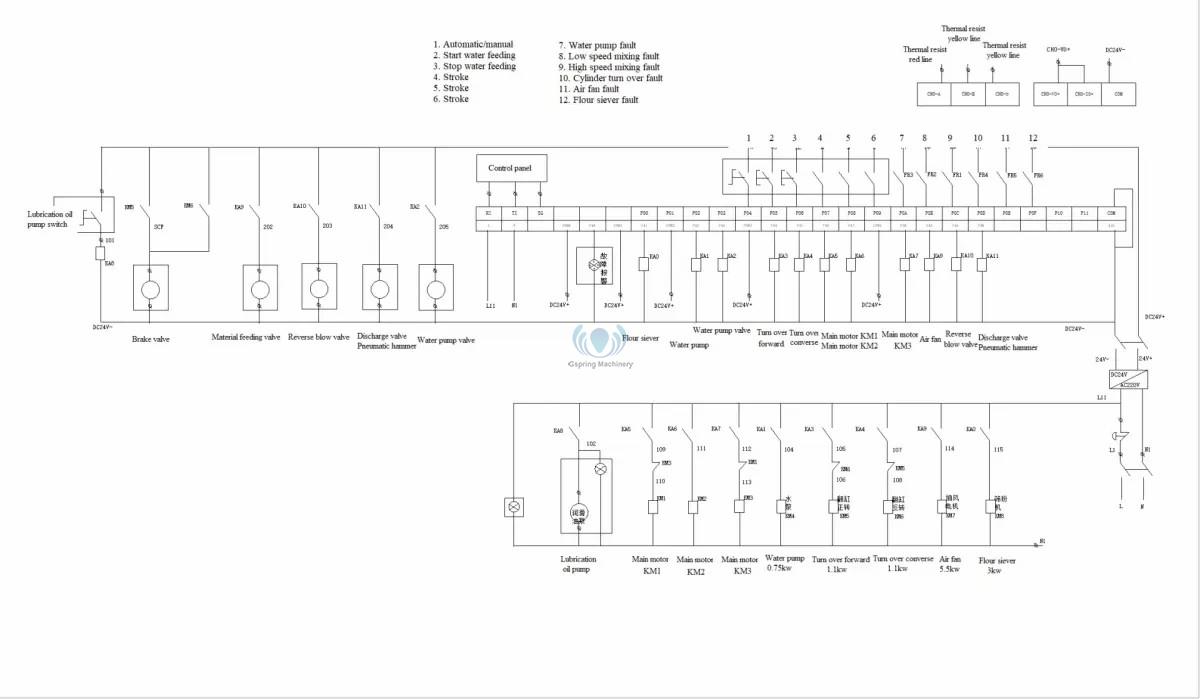
You May Ask Further
We are the professional supplier for High Quality Fermented /Panko Bread Crumbs Production Line, if any questions about the machine, pls email grace@chinagspring.com.


Contact: Grace Guo
Phone: +8617686617441
E-mail: grace@chinagspring.com
Whatsapp:+8617686617441
Add: No. 68, Jiuquzhuang Road, Shizhong District, Jinan, Shandong, China, 250000
We chat
